Actually not difficult to install Wilcom 2006 + SP2 for Windows XP. Just like installing any other program applications, just that there are some small things to consider when installing the application and order.
One more thing to note is that if on a PC already installed another version of Wilcom, from the few times I have done experiments always fail when the application is run. I will not discuss it, but here I will show you how to install Wilcom 2006 for Windows XP on a fresh PC, and the Installer Wilcom 2006 which I share, I have already given the order number on each folder that shows the sequence of steps undertaken to install application :
1.Open Wilcom 2006 WORK folder and run Setup fileAnd follow the steps bellow :
In the above options you can choose the user who can run this application
Check the “Wilcom Design Workflow”
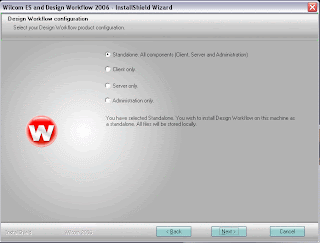
At this stage of the above you can choose and set the type of application that is integrated on the Wilcom 2006, then the next step select "Standalone All components" as shown in the picture below
At this stage, you can specify the default folder to store the results of the design that you create. Wilcom 2006 default setting is drive "C: \ Design"
And the next is click "Install" to begin the installation process
After the installation is complete, the setup window will display the message "PC must reboot", after you click "Finish" button the computer will reboot automatically.
After a computer reboot, windows will display the image as follows :
After a computer reboot, windows will display the image as follows :
Here it means the computer prompts you to connect the dongle to the PC. You do not need to be confused or panic because you do not have a dongle, you have to do is click the "Cancel" and then windows will display the following image, :
Click the "x" until the display disappears and the windows desktop appears.
Note : Do not select the “Resume” or “Exit” button
Note : Do not select the “Resume” or “Exit” button
2.Open Wilcom 2006 SP2 folder
And run WincomESServicePack2 file until finish installation then the computer will reboot automatically or you do reboot manually
And run WincomESServicePack2 file until finish installation then the computer will reboot automatically or you do reboot manually
Up here the Wilcom ES2006 + SP2 installation is complete. The next stage is to run the crack so that applications can be operated
3.Open Crack folder
3.1 Open Serial reader folder
Run the file "Serial Reader" and will appear like the picture below :
3.1 Open Serial reader folder
Run the file "Serial Reader" and will appear like the picture below :
The next step is click “Install Emulator” and then click “Get & Save LockIDs” like the picture bellow :
Save the file which is formed by the emulator with the name "Lock.ID" on MyDocumens folder or other folders that you want. After that close the emulator and run the Registration Entries file named "Uninstall" by right clicking on the file and select "Merge"
3.2 Open Keygen folder
Run “TOROActivatorGenerator” file that has the look like following :
Run “TOROActivatorGenerator” file that has the look like following :
Click “Generate for Wilcom 2006” and the computer will ask for a file called Lock.ID. Click Lock.ID files in MyDocuments folder and then click "Open"
After that progress will continue to form a file called "TORO_57FD245C.hasp" and placed by default in the Desktop folder
The next step is to copy the file "TORO_57FD245C.hasp" and place it in the folder C: \ Windows \ System32
3.3 Open Crack folder
3.3.1 Open “VirtualHaspUsb” folder
Run the registration file entries called "Wilcom" by right click and select "merge"
3.3.1 Open “VirtualHaspUsb” folder
Run the registration file entries called "Wilcom" by right click and select "merge"
After that run the file “install.bat”
Wait until the process is completed in the colmand window and displays the message
Driver updated successfully.
Press any key to continue . . .
Driver updated successfully.
Press any key to continue . . .
Press any key to finish a prosses at command windows
3.3.2 Open “USBFilter” folder
Run the registration entries file called “UsbFilter_Install” as the previous step
Run the registration entries file called “UsbFilter_Install” as the previous step
Wait until finish the prosses and a computer will reboot automatically
Up here the Wilcom ES2006 + SP2 installation is complete all and ready to operate, but before you operate the application is a good idea to open the Control Panel -> System -> Hardware -> Device Manager. Then expand the file "Universal Serial Bus Controllers" and make sure it is there is a file "Aladdin HASP Key" and Aladdin USB Key "
Up here the Wilcom ES2006 + SP2 installation is complete all and ready to operate, but before you operate the application is a good idea to open the Control Panel -> System -> Hardware -> Device Manager. Then expand the file "Universal Serial Bus Controllers" and make sure it is there is a file "Aladdin HASP Key" and Aladdin USB Key "
If the file that I mentioned above do not exist, do the uninstall process "only to crack it alone" with the opposite sequence, and then repeat the install process from the initial crack. And if it is complete, then the application is ready to run, it looks like the following.
Congratulations to create.


No comments:
Post a Comment